✓  15+ Years in Business ✓  75+ 5-Star Google Reviews ✓  Pakenham Showroom ✓  In-House Qualified Team ✓   Call Now 1300 287 188 ✓  15+ Years in Business ✓  75+ 5-Star Google Reviews ✓  Pakenham Showroom ✓  In-House Qualified Team ✓   Call Now 1300 287 188 ✓  15+ Years in Business ✓  75+ 5-Star Google Reviews ✓  Pakenham Showroom ✓  In-House Qualified Team ✓   Call Now 1300 287 188

Start Your Bathroom Renovation With Total Clarity — Just $299

Our $299 Professional Consultation Investment gives you a fully planned, expert-guided roadmap for your bathroom — eliminating guesswork, hidden costs, and risks. Backed by 15+ years in business, a physical showroom, and 100+ 5-star reviews.

✔ Technical & Design Blueprint

Detailed measurements, layout advice, and design direction — not just a quick quote.

✔ Fixed-Price Investment Plan

A transparent, fully-costed plan with zero hidden extras, tailored to your bathroom.

✔ All-Inclusive Service

We supply all tiles, fixtures, and trades — guaranteeing quality, compliance, and warranty.

✔ Detailed Technical Inspection ($199 value)

A full site check of layout, waterproofing, and potential risks — so nothing is missed.

✔ Design & Style Consultation ($250 value)

Expert advice on layout improvements, upgrades, and style options tailored to your taste.

✔ Access to Our Showroom & Virtual Selections ($150 value)

See and select tiles, fixtures, and fittings from our premium curated ranges.

✔ Fixed-Price Investment Plan ($300+ value)

A fully-costed plan with no hidden extras — giving you a complete roadmap to your new bathroom.

Total Value: $900+

Yours today for just $299

Book My Professional Consultation – $299

15+ Years in Business | Physical Showroom in Pakenham | 100+ 5-Star Reviews | Fully NCC & AS3740 Compliant

What Happens After You Book?

Our streamlined process means most bathrooms are fully completed in just 3 working weeks (for an average-sized bathroom). Here’s exactly what you can expect after securing your $299 Professional Consultation Investment:

1

Confirm & Schedule

We lock in your consultation date and send a pre-visit information pack with helpful guides and videos.

2

In-Home Consultation

A qualified expert inspects your bathroom, takes detailed measurements, and discusses layout, style, and upgrade options.

3

Showroom Presentation

We prepare a fully costed investment plan, complete with your chosen tiles, fixtures, and fittings, and walk you through every detail in our showroom (or via Zoom).

Frequently Asked Questions

Why is the consultation $299 when others offer free quotes?

Free quotes are often surface-level guesses. Our $299 Professional Consultation Investment delivers a full technical inspection, a personalised design session, and a fixed-price plan that prevents costly mistakes.

What exactly do I get with the $299 consultation?

You’ll get a thorough technical assessment, design advice, detailed measurements, compliance checks, and a fully costed investment plan with no hidden extras — plus access to our curated showroom selections.

Can I provide my own tiles or fixtures?

We supply everything needed for your bathroom renovation. This ensures every component is perfectly matched, compliant, and covered by our warranty — saving you time, stress, and potential compatibility issues.

How long will my bathroom renovation take?

Our in-house team completes most bathroom renovations in just 3 working weeks for an average-sized bathroom, thanks to our streamlined process and stocked warehouse.

Do you handle all trades and compliance?

Yes. Every trade is managed in-house, and we follow the latest NCC and AS3740 standards. You’ll receive full compliance documentation and a workmanship warranty with every project.

you can be confident that The Shower Man take excellent care of you during your
bathroom renovation ...

Shape
triangle
process

STEP 1:

Professional Consultation

We start with an in-home consultation to:
Understand your needs, goals, and preferred style.

Assess your bathroom’s layout, waterproofing, and structural considerations.

Discuss design ideas and outline practical, tailored options.

This consultation fee is an investment in a technical assessment and design direction — not just a free quote.

process

STEP 2:

Showroom Visit & Selections

You’ll visit our Pakenham showroom to:

Explore full bathroom displays and finishes.

Select tiles, vanities, tapware, shower screens, and accessories with expert guidance.

Review upgrade options (eg; feature recessed niches and other upgrades).

Can’t visit in person?
We offer A virtual selection Process If you are unable to attend our showroom

triangle
triangle
process

STEP 3:

Fixed-Price Investment Plan

With your selections locked in, we prepare a fully detailed fixed-price investment plan:

Includes finalised layout,
fittings, and inclusions.

Transparent pricing with no hidden extras or variations later on.

Presented in person at the showroom or via video call, so we can walk you through every detail.

process

STEP 4:

Pre-Start Planning & Scheduling

Final confirmation of all selections and project details.

All fixtures, tiles, and materials are ordered and prepared.

You’ll receive a Pre-Start Pack with a day-by-day project outline and what to expect.

We hold an internal team briefing to review your project before starting.

triangle
process

STEP 5:

Site Protection & Demolition

Floors, walls, and surrounding areas are protected
.

We carefully remove all old fittings, fixtures, tiles, and linings.

We inspect for hidden leaks, rot, or structural issues, with repairs completed if needed. precision tools connected to a dust extraction system to minimise dust and protect surrounding areas. All job waste is removed immediately from the home and disposed of responsibly.

A Pre-Start Condition Report is completed with photos for peace of mind.

triangle
process

STEP 6:

Plumbing Rough-In

our Licensed plumbers rough-in all services.

Mixer taps, shower heads  and drainage are installed behind walls and substrates before new linings are installed.

We confirm all positions with you before work proceeds.

triangle
triangle
processprocessdetails

STEP 7:

Substrate & Waterproofing

Walls are re-lined with  wet-area wall linings and subflooring prepared.

A full AS-3740 compliant waterproofing system is applied and documented.

Waterproofing is installed for compliance and quality.

processdetails

STEP 8:

screeding is installed to the shower base to create appropriate fall to the waste and to provide a stable bedding for the shower base tiles


triangle
triangle
process

STEP 9:

FATiling

Shower base and floor tiling are completed first to achieve perfect falls.

Wall tiling Installation follows.  


process

STEP 10:

Grouting & Sealing

Once the tiles are set, we apply premium grout with precision, ensuring every joint is evenly filled and finished for both durability and a flawless appearance.

Excess grout is carefully removed, and all grout lines are cleaned to create sharp, tidy lines that complement your tile layout.

For clients seeking extra durability and stain resistance, we offer an upgrade to epoxy grout, which provides superior performance in high-moisture areas.

We then seal all junctions- such as corners, wall-to-floor edges, and around fixtures with high-quality, mould-resistant silicone.

triangle
processdetails

STEP 11:

Plumbing Fit-Off

fit-off stage, where all tapware, mixers, shower heads, and other fixtures are installed.

Each fitting is carefully aligned to match your design and ensure a professional, balanced look.

Seals and connections are tested under pressure to ensure there are no leaks or defects.

We check everything is functioning exactly as they should.
Any final adjustments are made so that all fixtures sit flush and secure

triangle
processprocess

STEP 12:

Shower Screen & Accessories

Your new shower screen is carefully installed, levelled, and sealed to ensure a watertight fit and smooth operation.

We align and adjust all hinges, seals, and fittings for a sleek, modern finish.

Once the screen is in place, we install mirrors, towel rails, toilet roll holders, and other finishing accessories, ensuring each item is securely fixed and perfectly positioned.

Every detail is checked to ensure the bathroom is both functional and visually seamless

triangle
triangle
process

STEP 13:

quality inspection

Before we proceed with handver, we complete a comprehensive quality inspection of all workmanship to ensure it meets our high standards.

We check all tiling alignment, grout installation, and falls to ensure correct drainage.

Any imperfections are corrected on the spot to guarantee a flawless result before moving forward.

process

STEP 14:

Final Inspection

A comprehensive quality check is carried out on all fixtures and finishes.

You receive care instructions, and a handover pack.

To finish, we perform a comprehensive inspection, checking every detail
against our high-quality standards.

You’ll receive care instructions and aftercare tips — leaving you with total peace of mind.

triangle
triangle
process


STEP 15:

Handover

We clean the area and ensure your bathroom is ready for  use the next morning.

You’ll receive care instructions and aftercare tips — leaving you with total peace of mind.

We follow up with communication to ensure your satisfaction and happiness

Book A Site Inspection Online Now
calender
1300 287 188 Problem Solved Or It’s FREE

complete bathroom
renovation

video
play
Client Testimonials

The Shower Man Testimonials

Testimonial
Comma
Google
4
.
0
Star rate

Our stay at Amanda’s place exceeded our expectations. We stayed there to attend the RCH – the location was outstanding, so central and easy to get to the hospital. The place was huge and had everything we needed for travelling with kids while still being clutter free and minimalistic It was freshly painted and renovated, basically brand new. Easy to communicate with host, it made the trip very easy.

Leah

Mortlake, Australia
Testimonial
Comma
Google
5
.
0
Star rate

Amanda’s place is very modern. I would say better in person than in the photo’s. Comfortable beds and cosy space.

Ben

Victoria, Australia
Testimonial
Comma
Google
5
.
0
Star rate

We really enjoyed our stay at this Airbnb. It was very spacious, homely and had all the amenities we needed for a 5 week stay. Amanda was a wonderful host who answered every question or concern we had very promptly. Would definitely recommend this spot for anyone completing student placements at the Royal Melbourne, as the location was ideal for both campuses.

Monica

Ballarat, Australia
Testimonial
Comma
Google
4
.
0
Star rate

Amanda’s place was great, absolutely everything that we needed for our stay. Amanda was a great host and made sure that we were comfortable and had everything we needed. Amanda’s communication was very friendly and prompt and I highly recommend this place for your next stay. Great location with trams and trains right on your doorstep and endless parks within walking distance.

ian

Nightcliff, Australia
Testimonial
Comma
Google
4
.
0
Star rate

What a great spot! We thoroughly enjoyed this very comfortable home, & the location was fabulous. Between the many nearby local playgrounds, excellent cycling paths, and even some opportunities to see unique wildlife at the wetlands, it was a perfect place for our family. Thank you for sharing your home, Amanda!

Simone

Nightcliff, Australia
Testimonial
Comma
Google
4
.
0
Star rate

Amanda is a very responsive host. Her apartment is cosy and has everything you need for an enjoyable stay. It’s conveniently located close to the city and in a caul de sac with safe on-street parking. It was comforting to have private access to the apartment. I highly recommend this apartment.

Simone

Salisbury North, Australia
Testimonial
Comma
Google
5
.
0
Star rate

Very clean and great communication. Amanda was a lovely host.

Anna

Camden, Australia
Testimonial
Comma
Google
4
.
0
Star rate

Was a great location to the inner city. Communication was great and was relatively clean.

Cassie

Sydney, Australia
Testimonial
Comma
Google
4
.
0
Star rate

Beautiful townhouse the only thing no Aircon gets really hot.

Shaun

Southbank, Australia
Testimonial
j
Comma
Google
4
.
0
Star rate

Wonderful apartment in an excellent location. It is very spacious and is perfect for our family of 6 adults. WiFi works well and accessible from all rooms. The beds are comfy, good linen and plenty of hot water. The dishwasher, washer and dryer are all a bonus. A tram stop and train station are very close by and it takes about 10 Wonderful apartment in an excellent location. It is minutes to reach the Melbourne CBD. It’s only a 30 minute drive to the airport. Love the digital lock for the door rather than keys. It made it really easy for us all to come and go. Thanks for the great stay!

Jennifer

Kedron, Australia
Testimonial
T
Comma
Google
5
.
0
Star rate

Erol and Dane did an amazing job and a spotless builder’s clean once it was completed! Highly recommend AAA+++

Teana K

Professionalism, Quality, Responsiveness, Value
Testimonial
d
Comma
Google
4
.
0
Star rate

I had a cracked shower base and damaged shower screen and after a plethora of businesses coming around and giving me quotes to build the Taj Mahal, which wasn’t what I wanted. Amanda came around and I explained what I wanted. Amanda was great, went with the insert and a new shower screen. It’s the second bathroom and it’s not used that much. Quality work and very happy customers. I have already recommended to a friend to use the Shower Man Melbourne.

Dale Culpin

Professionalism, Punctuality, Quality, Responsiveness, Value
Testimonial
r
Comma
Google
4
.
0
Star rate

Professional high quality service from quote to planning to buildout. No short cuts. Very pleased, will hire again in future if I need more bathroom work done.

Robert Prije

Professionalism, Quality
Testimonial
c
Comma
Google
5
.
0
Star rate

Had a shower recess renovated. I love the job they did including the punctuality of the whole team. Thanks

christiane mccann

Professionalism, Punctuality, Quality, Responsiveness, Value
Testimonial
D
Comma
Google
4
.
0
Star rate

There was a good line of communication so that the whole process from the beginning ran very smoothly. Dane who carried out the work was quick and efficient.

Duleep Donikku Hewa

Professionalism, Punctuality, Quality, Responsiveness, Value
Testimonial
d
Comma
Google
5
.
0
Star rate

Very professional, and the end result looks great.

David Kemp

Professionalism, Quality
Testimonial
M
Comma
Google
4
.
0
Star rate

The service was great . Amanda as the sales person was very helpful. Erol and the team were very professional couldn’t ask for better service. Would highly recommend this company. Very honest and they are very happy to discuss all options in regards to work being completed.

Marie

Professionalism, Punctuality, Quality, Responsiveness, Value
Testimonial
H
Comma
Google
5
.
0
Star rate

Thank you very much guys, I am very happy with your service and highly commended your company, I will choice your service again in the future. Thank you, Amanda.

haibin liu

Professionalism, Punctuality, Quality, Value
Testimonial
Comma
Google
4
.
0
Star rate

If I could give them more than 5 stars, I would. Could not ask for more – all of the team over-performed from start to finish, and completely replaced our tired leaky old shower on time and on budget. I’m recommending The Shower Man to everyone I know.

Fiona Mowat

Professionalism, Punctuality, Quality, Responsiveness, Value
Testimonial
Comma
Google
5
.
0
Star rate

Professional high quality service from quote to planning to buildout. No short cuts. Very pleased, will hire again in future if I need more bathroom work done.

Robert Prije

Professionalism, Quality
Testimonial
Comma
Google
4
.
0
Star rate

I highly recommend The Shower Man Melbourne. We needed a full bathroom remodel and even during COVID-19 restrictions, the team were highly professional, incredibly responsive, good communicators and worked hard to meet our needs. They were fantastic, and I would not hesitate to use them again.

Melissa Bloomer

Professionalism, Quality, Responsiveness, Value
Arrow
Arrow

Is your bathroom old, tired, and no longer meeting your needs?

  • A full renovation allows you to address core issues like failed waterproofing.
  • You can update all fixtures and fittings for better, more modern functionality.
  • This process also lets you redesign the layout to perfectly suit your specific needs.
  • It is a permanent solution that adds significant value to your home.
  • Ultimately, a renovation creates a beautiful space you will love for years to come.
  • Over time, your bathroom can become outdated and inefficient.
  • It may also become prone to persistent issues like leaks and water damage.
  • While minor fixes might seem appealing, they often fail to address these underlying problems.
  • A complete bathroom renovation is the only way to truly transform your space.
  • This approach ensures high-quality finishes and durable results for the long term.
Luckily, The Shower Man are Melbourne's #1 Shower Repair specialists... so your home and family's health will be in safe hands.
Book A Site Inspection Online Now
calender
1300 287 188 Problem Solved Or It’s FREE
LET US FIX YOUR shower TODAY!

Why Choose The Shower Man?

HERE'S 5 REASONS WHY...
  • 'problem solved or it's free" Guarantee!

    When we say you're getting a permanent solution... WE MEAN IT! That's why we offer our clients a "Problem Solved, Or It's Free"!

  • We Are Shower repair Specialists!

    We don't install kitchens; we don't build decks; we don't repair gutters... WE FIX SHOWERS AND BATHROOMS! So, if you have a shower issue, call your local specialist today!

  • Over 20+ Years Experience

    Amanda and Erol, founders and owners of The Shower Man, started The Shower Man in 2010 and have been in the industry for 30+ years... So they know a thing or two about showers and bathrooms!

  • pakenham Owned & Operated

    The Shower Man is a locally owned and operated business located in Pakenham, Melbourne- Serving Melbourne Homeowners from Pakenham to Point Cook

  • The Shower Man 10-Point Guarantee' (Extended!)

    We have the 'biggest and boldest' leaking shower guarantee, so you can be confident knowing that we can solve your shower problem!

Click Here To Check It Out!

how long will
the job take

video
play

Our No risk

10 Point Shower Man Guarantees

img

Problem Solved, Or
It's FREE Guarantee

tag

Fixed Price
Guarantee

tag

10- Year
Guarantee

tag

Permanent Solution Guarantee

tag

8 Point Quality
Inspection Guarantee

tag

Best Intentions, Integrity Always Guarantee

tag

Show Up
Guarantee

tag

The Best You’ve Ever
Had Guarantee

tag

Always There For You Guarantee

tag

Work
Clean Guarantee

Payment
Schedule

video
play

understanding how showers are built

video
play
WARNING

Don’t Be Fooled By Scammers Claiming to Magically Fix Leaks...

They’ll promise a quick Fix for your leaking shower

but

the only thing that disappears is your moneY... and them, when you try to claim on the warranty.

A QUICK PATCH JOB WILL NEVER FIX A SERIOUSLY LEAKING SHOWER
Failed Grout & Cracked Tiles Are Symptoms of a Failed Waterproofing Membrane.

Crazy right...

In fact, simply sealing over a major leak can TRAP moisture and cause even more damage than you had to begin with!

At The Shower Man, we fix leaking showers permanently all day, every day... it's what we do!

We've resolved thousands of leaking showers throughout Melbourne where even the most stubborn of failed bathrooms have been no match for our expert team's guaranteed process!

So, don't waste your time, money, and energy on quick-fix promises.

Call us today on 1300 287 188 to fix ALL your shower issues once and for good...

IT PAYS TO ENGAGE THE SERVICES OF A SHOWER REPAIR SPECIALIST!

YOUR LOCAL Shower SPECIALIST...

Servicing most melbourne suburbs

Our servicing Local Areas
  • Pakenham
  • Berwick
  • Narre Warren
  • Croydon
  • Cranbourne
  • Officer
  • Ringwood
  • Surrey Hills
  • Hallam
  • rowville
  • Lyndhurst
  • Beaconsfield
Plus much more...
WITH A 4.9 STAR RATED SERVICE

We're SHOWER LEAK REPAIR Specialists That You Can Trust

guarantee
guarantee
guarantee
guarantee

what working with The shower man looks like

video
play
Shower Leak&Compliance checklist

Is Your Shower Built properly?

WATER DAMAGE TO PLASTER OR SWELLING OF ARCHITRAVES OR SKIRTING BOARDS.

One of the most common signs of a leaking shower is water damage to plaster, architraves, or skirting boards. Showers often leak where the wall tiles meet the shower base or floor tiles. When the grout cracks or silicone breaks down, water seeps through and soaks into the plasterboard or wall sheeting behind the tiles. From there, it can travel along the floor or wall, causing timber frames, architraves, and skirting boards to swell or warp.

You might also notice water stains on walls or ceilings in rooms next to or beneath the bathroom. These are clear warning signs that your shower waterproofing has failed and needs attention before serious damage occurs

FLOOR OR WALL TILES CRACKING OR LIFTING & FLOORING WARPING

When water leaks beneath floor tiles and soaks into the subfloor, the trapped moisture causes the tiles to loosen and the grout to crack. Without proper waterproofing, the flooring can warp and shift, leading to uneven surfaces, cracked floor grout, and tiles that start lifting or coming away from the floor. In severe cases, water absorption and expansion can create a visible hump or raised section in the bathroom floor.

CRACKED OR MOULDY GROUT AND SILICONE IN YOUR SHOWER

If the grout between the shower wall tiles and shower base tiles is missing, cracked, or constantly mouldy, it’s often a sign of a leaking shower. Many homeowners find that no matter how much they scrub, the mould keeps coming back. This happens because water is penetrating behind the tiles and saturating the wall lining — a clear sign that the shower waterproofing was never installed, or not installed correctly, in line with AS 3740 waterproofing standards.

Silicone can also develop mould that won’t clean off, as the mould grows from behind the surface due to water leaking behind it. In a properly waterproofed shower, this issue does not occur.

MOULD, MUSHROOMS, OR ANTS AROUND YOUR SHOWER

Some homeowners are surprised to find mushrooms growing near their shower or even in adjoining rooms. This happens because ongoing moisture and decaying subfloor materials create the perfect environment for fungi to thrive. In many cases, the same moisture problem also attracts ants and other pests. Both are clear signs of a leaking shower or failed waterproofing that needs immediate attention.

WHY SHOWER BASES FAIL OR CRACK

Acrylic and polymarble shower bases must be installed on a solid mortar bed with no gaps or hollow pockets. If there are voids beneath the base, it won’t have proper support and will flex under weight, eventually leading to cracks. Since these shower base shells are only around 10mm thick, full support from the mortar bed is essential.

However, even a well-installed base can fail if there are leaks from the wall linings or tiles. Water that seeps underneath the base can soften or break down the mortar bed, causing movement, instability, and premature cracking of the shower base.

IS THE SHOWER RECESS WALL TILING COMPLETELY FLUSH WITH THE SHOWER BASE?

Shower wall tiles should be installed so they sit flush with the shower base, allowing a neat and continuous bead of silicone to seal the junction between the wall tiles and the base. Tiles should never protrude or overhang the base, as this prevents proper sealing, traps water, and eventually leads to leaks.

A common issue occurs when the shower base has been “checked” into the wall too far or not far enough:

  • Checked in too far: The wall tiles protrude and overhang the base, making it impossible to seal properly.
  • Not checked in far enough: This creates a flat spot where water can sit against the wall tiles and silicone, eventually seeping through.

In some cases, the shower base is the wrong size for the space, and the builder has “made do” to make it fit. This improper alignment often results in poor sealing, water pooling, and eventual leaks.

DARK OR DISCOLOURED TILES IN THE SHOWER

If you look at your shower with the door open and notice that the lower wall tiles or floor tiles appear darker than the rest, it’s often a sign of a leaking shower. This happens when water seeps through cracks or gaps and penetrates the wall lining behind the tiles or the subfloor beneath them. The tiles become waterlogged, absorbing moisture from behind, which causes the darker, damp appearance.

IS YOUR SHOWER GRATE INSTALLED CORRECTLY?

A shower grate must always be installed into a puddle flange, which acts as a barrier to ensure any water that seeps through the tiles and onto the waterproofing is directed into the plumbing system. For the system to work correctly, the shower grate must also have a connected pipe that sleeves into the puddle flange, ensuring water cannot escape anywhere except into the trap and drain.

The grate should be positioned at least 50mm away from each wall, as the puddle flange fitting is usually around 200mm in diameter. If the grate sits too close to a wall or appears misaligned, it’s often a sign that the puddle flange is missing or incorrectly installed, which can lead to leaks and water damage

CHECKING SHOWER BASE FALL (AS 3740 & NCC COMPLIANT)

To ensure your shower drains correctly and complies with current standards, the shower base must have a minimum fall towards the waste outlet:

  • Enclosed showers (with a hob, screen, or door): 1:100 minimum fall (1 mm for every 100 mm of distance).
  • Unenclosed showers (wet rooms or open showers): 1:80 minimum fall (1.25 mm for every 100 mm of distance).

How to check: Place a level on the shower base, with one end positioned at the waste and the other against each wall or edge. You should be able to measure the correct fall as per the ratios above.

Visual indicator: A well-installed shower base typically has split tile lines running from each corner of the shower to the waste outlet. These splits help create the necessary slope for water to flow effectively. If the tiles appear flat, or if there are no visible splits, the shower base may not have sufficient fall, increasing the risk of water pooling and leaks.

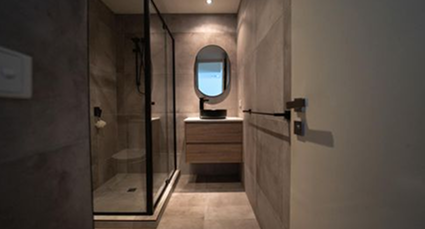
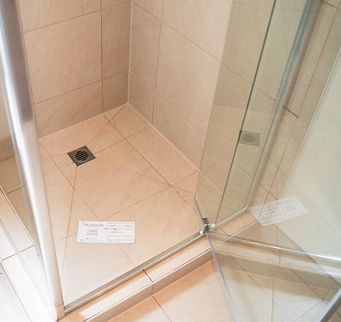
HAS YOUR SHOWER BEEN FITTED A WITH COMPLIANT WATER STOP?

A water stop is mandatory under NCC  and AS 3740 to prevent leaks and ensure your shower is correctly waterproofed. It must be installed around the external perimeter of the shower base to contain water and direct it back to the waste outlet.

What Are the Options?

A compliant water stop can be:

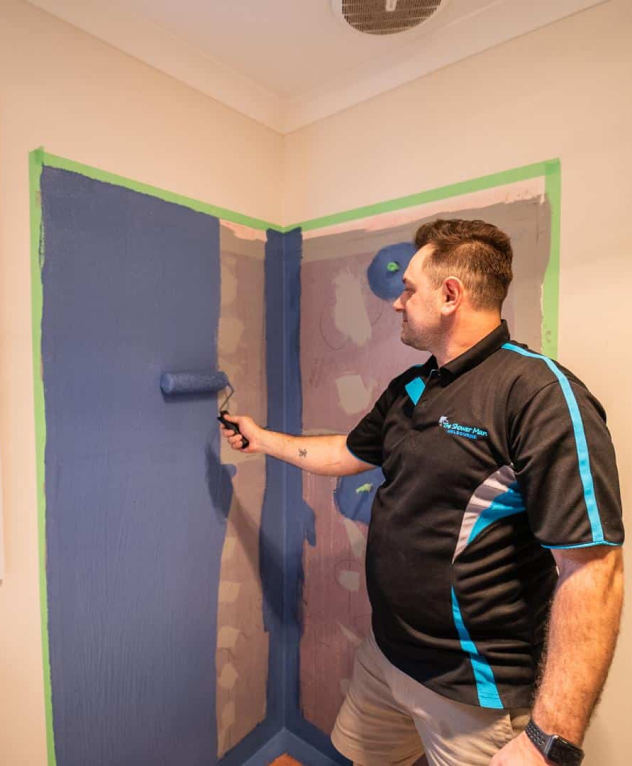
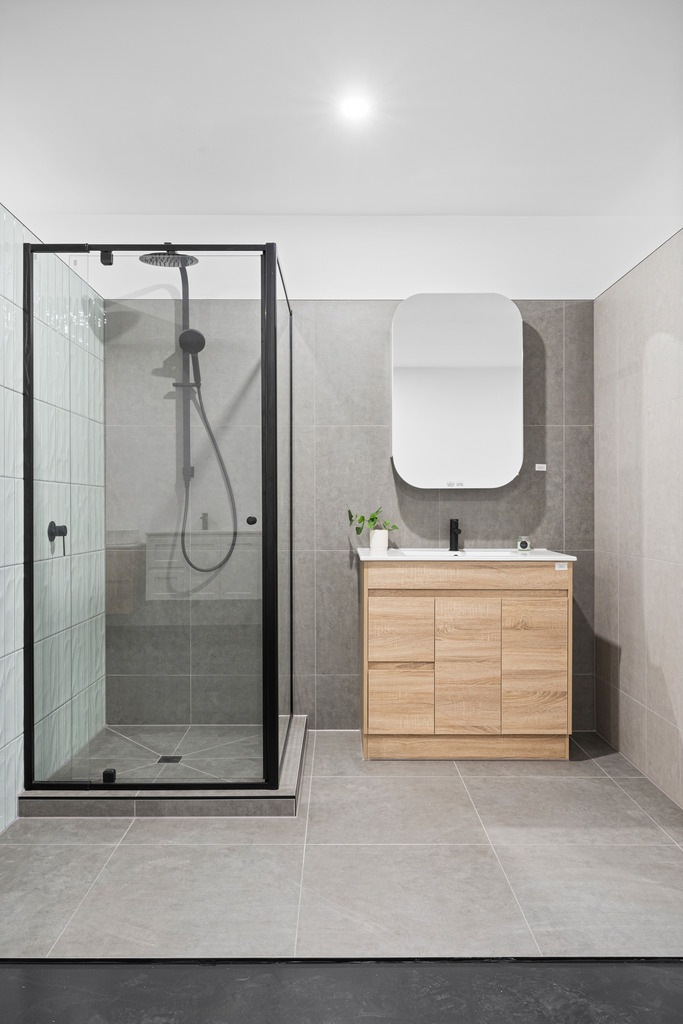
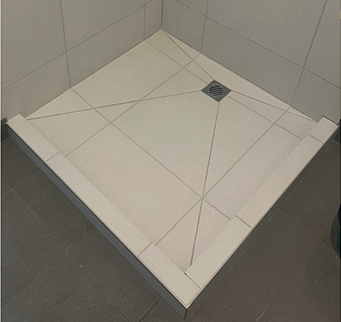
  • A  hob – A raised, waterproofed, tiled barrier (typically 80–100 mm high). Timber hobs are never compliant.
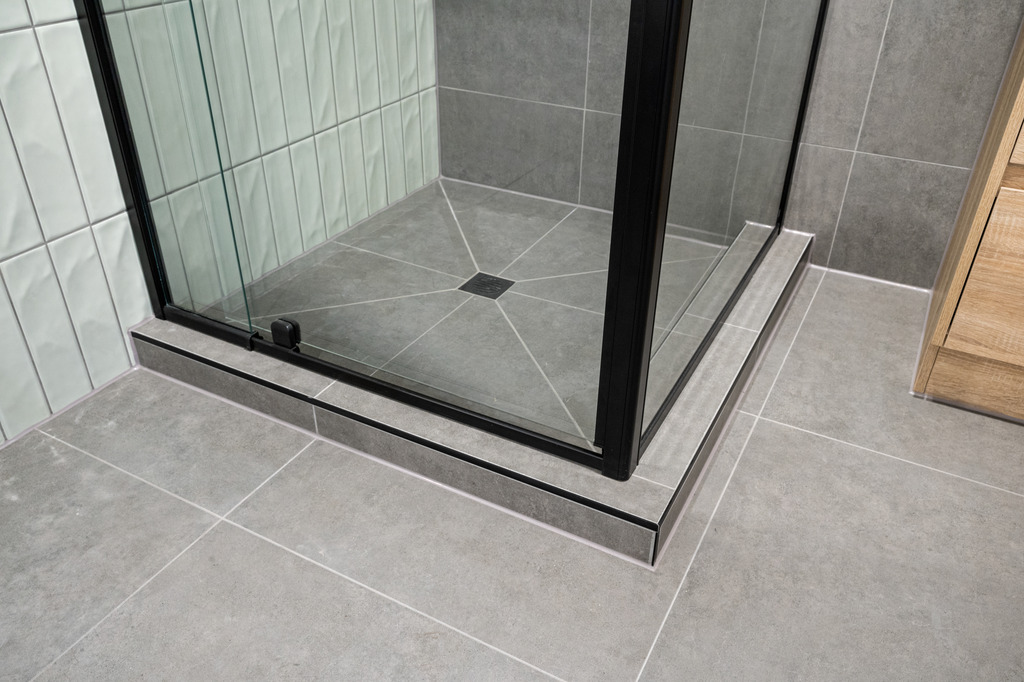
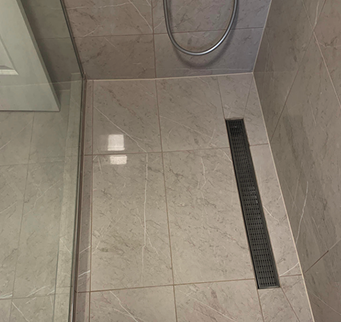
  • An aluminium angle – Must protrude at least 5 mm above the finished tile height and be fitted with an aluminium channel cover so the shower screen can sit on top and overhang inside the shower, ensuring water drains back into the base.
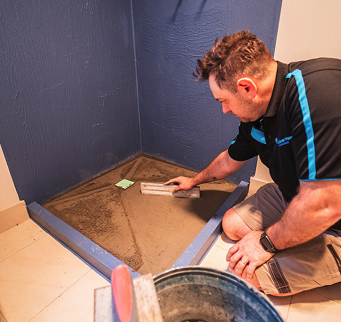
  • A step-down (recessed shower base) – Designed during the build, with the floor lowered and the correct fall installed. Step-downs are rarely possible in renovations, as cutting into concrete slabs or joists requires engineering approval and can compromise structural integrity unless the home was designed this way from the start.

Why a Hob is Often the Best Choice

A masonry hob is a reliable, durable solution because it:

  1. Contains water effectively, preventing leaks onto the bathroom floor.
  2. Allows the waterproofing membrane to be sealed more securely.
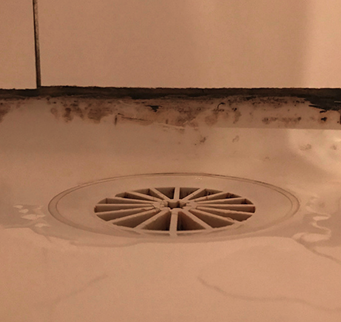
  3. Improves drainage, ensuring water flows directly to the waste outlet.
  4. Provides a stable base for positioning the shower screen, so water drains back inside the shower.
  5. Avoids the engineering challenges of step-downs and is more durable than aluminium angles.

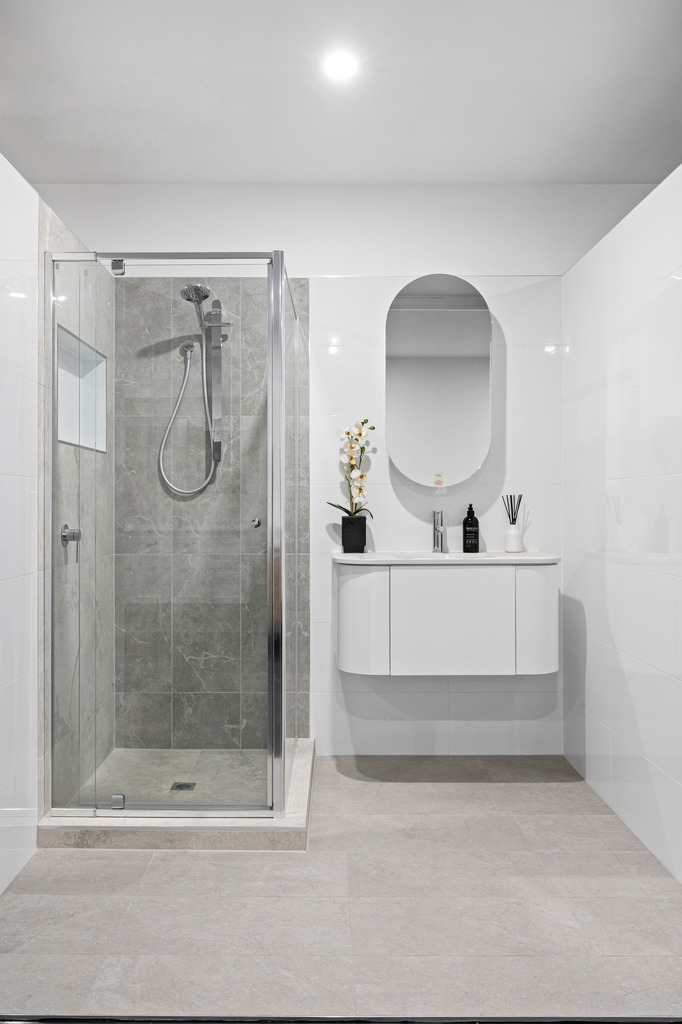
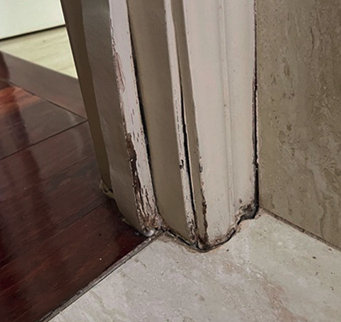
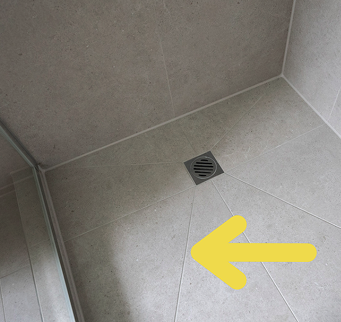
How to Check if Your Water Stop is Compliant

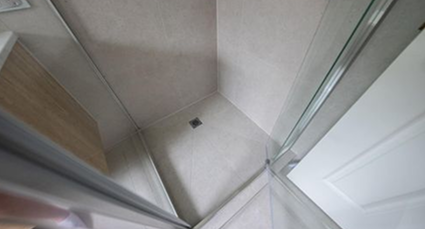
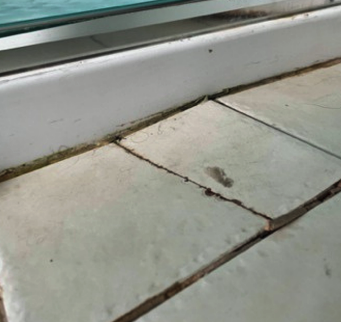
  • Look for a raised hob or aluminium strip at the shower entry.
  • Check the height: aluminium angles must stick up at least 5 mm above the finished tiles. If your shower screen sits flat on tiles you should not be able to push a scraper or blade  between the bottom of the shower scceen and tiles
  • Inspect the shower screen: it should sit on top of the water stop, with the frame overhanging inside the shower.
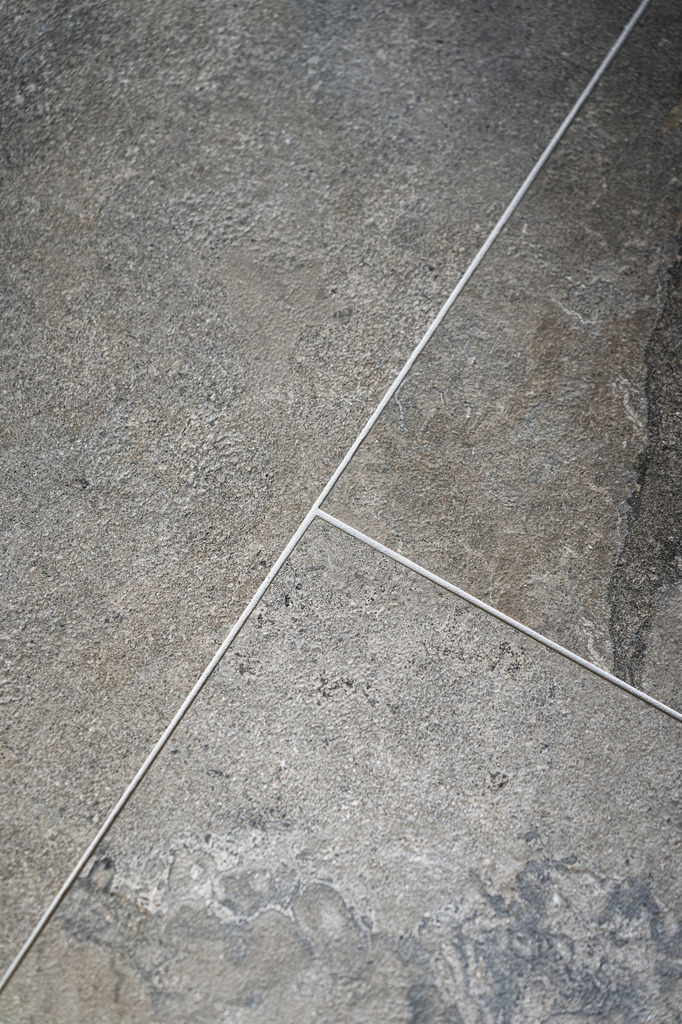
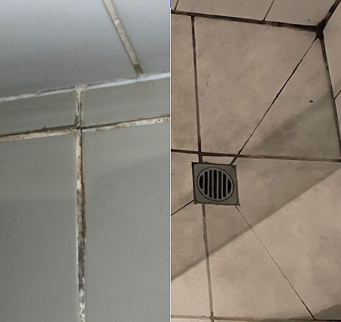
  • Look for visible tile splits and fall toward the drain.
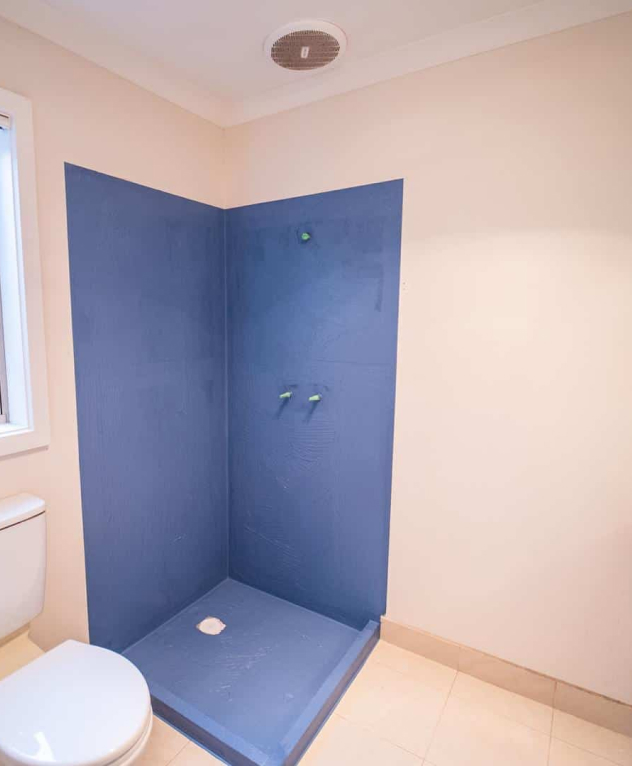
  • No visible barrier? A flat transition from the shower to the bathroom floor with no water stop is a sign of non-compliance.

Why This Matters

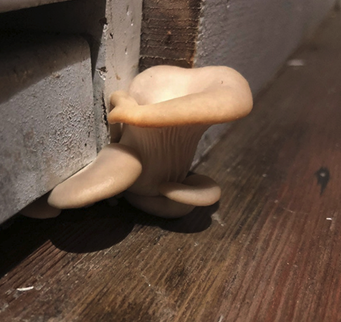
Without a compliant water stop, your shower cannot meet AS 3740 waterproofing standards, increasing the risk of leaks, water damage, mould, and costly structural repairs.

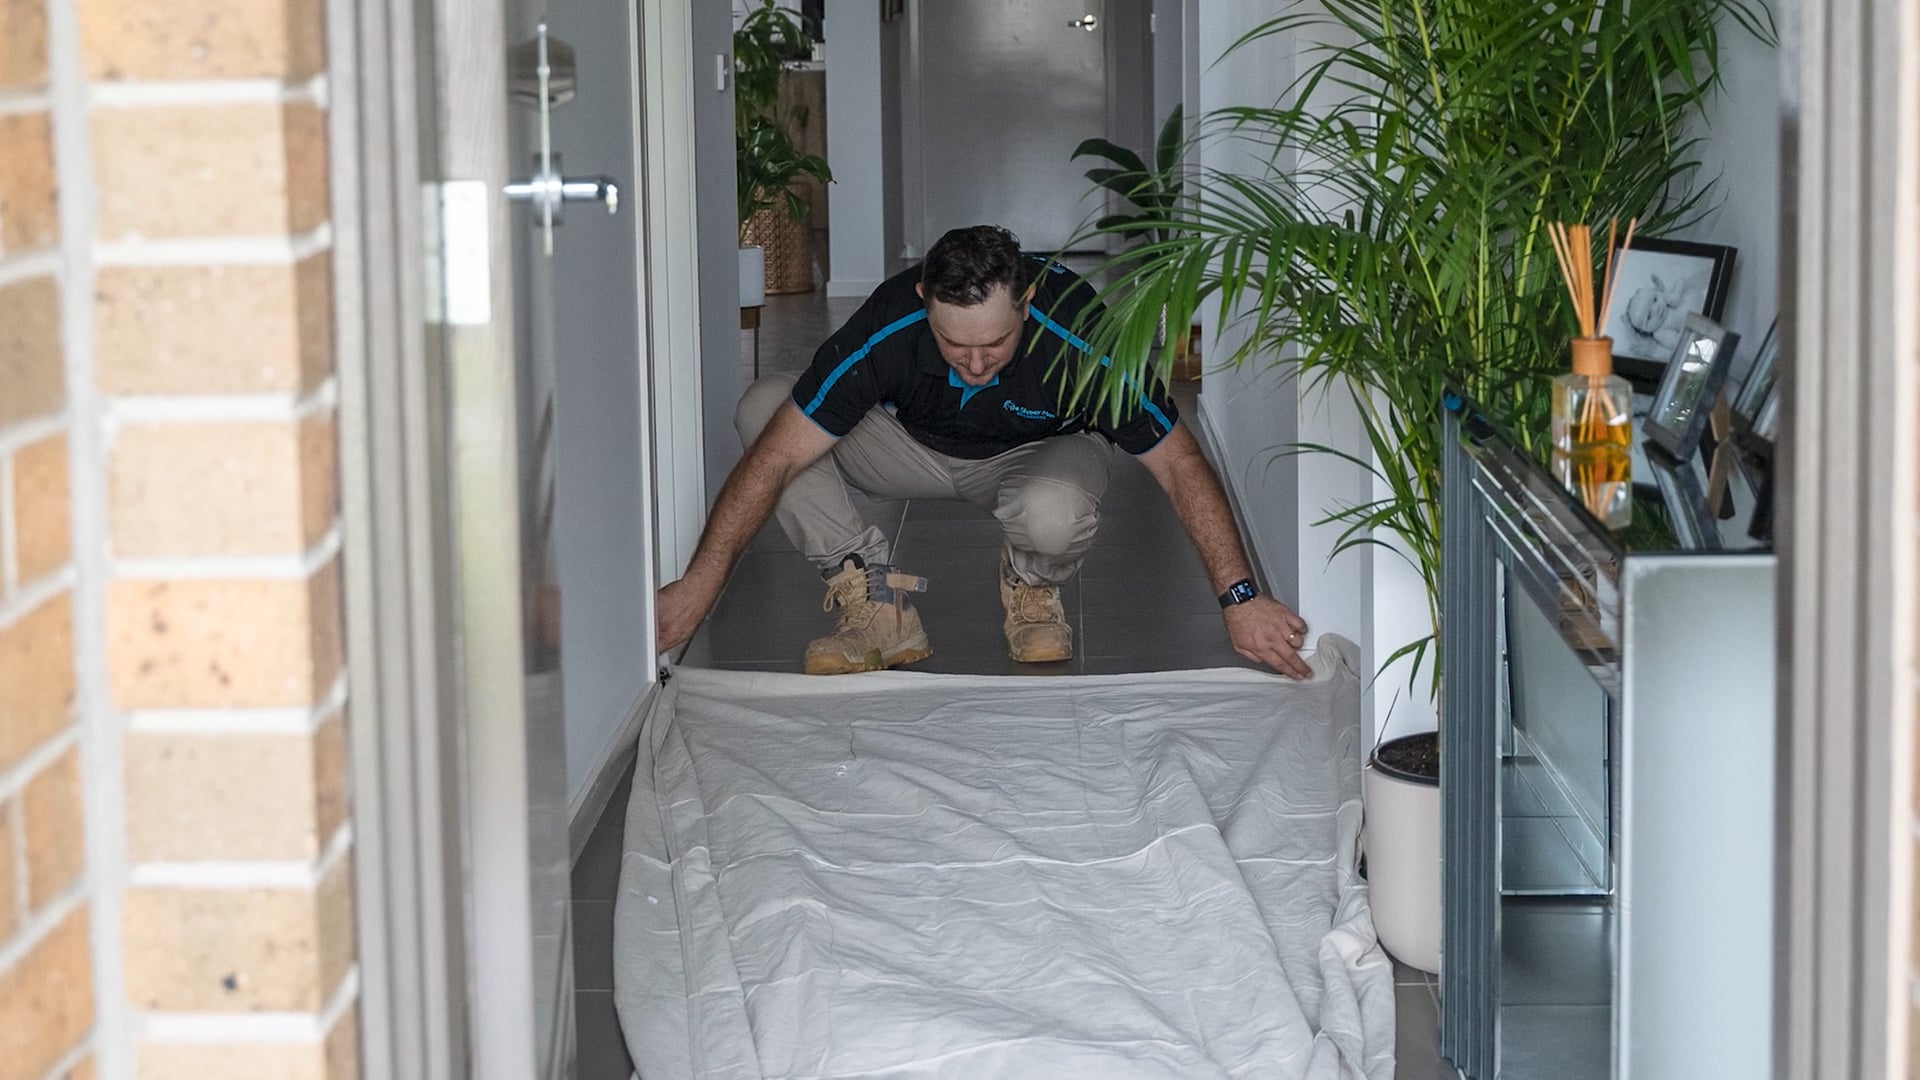
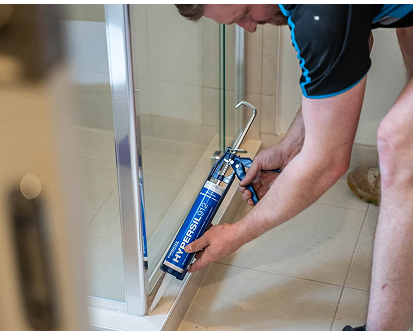
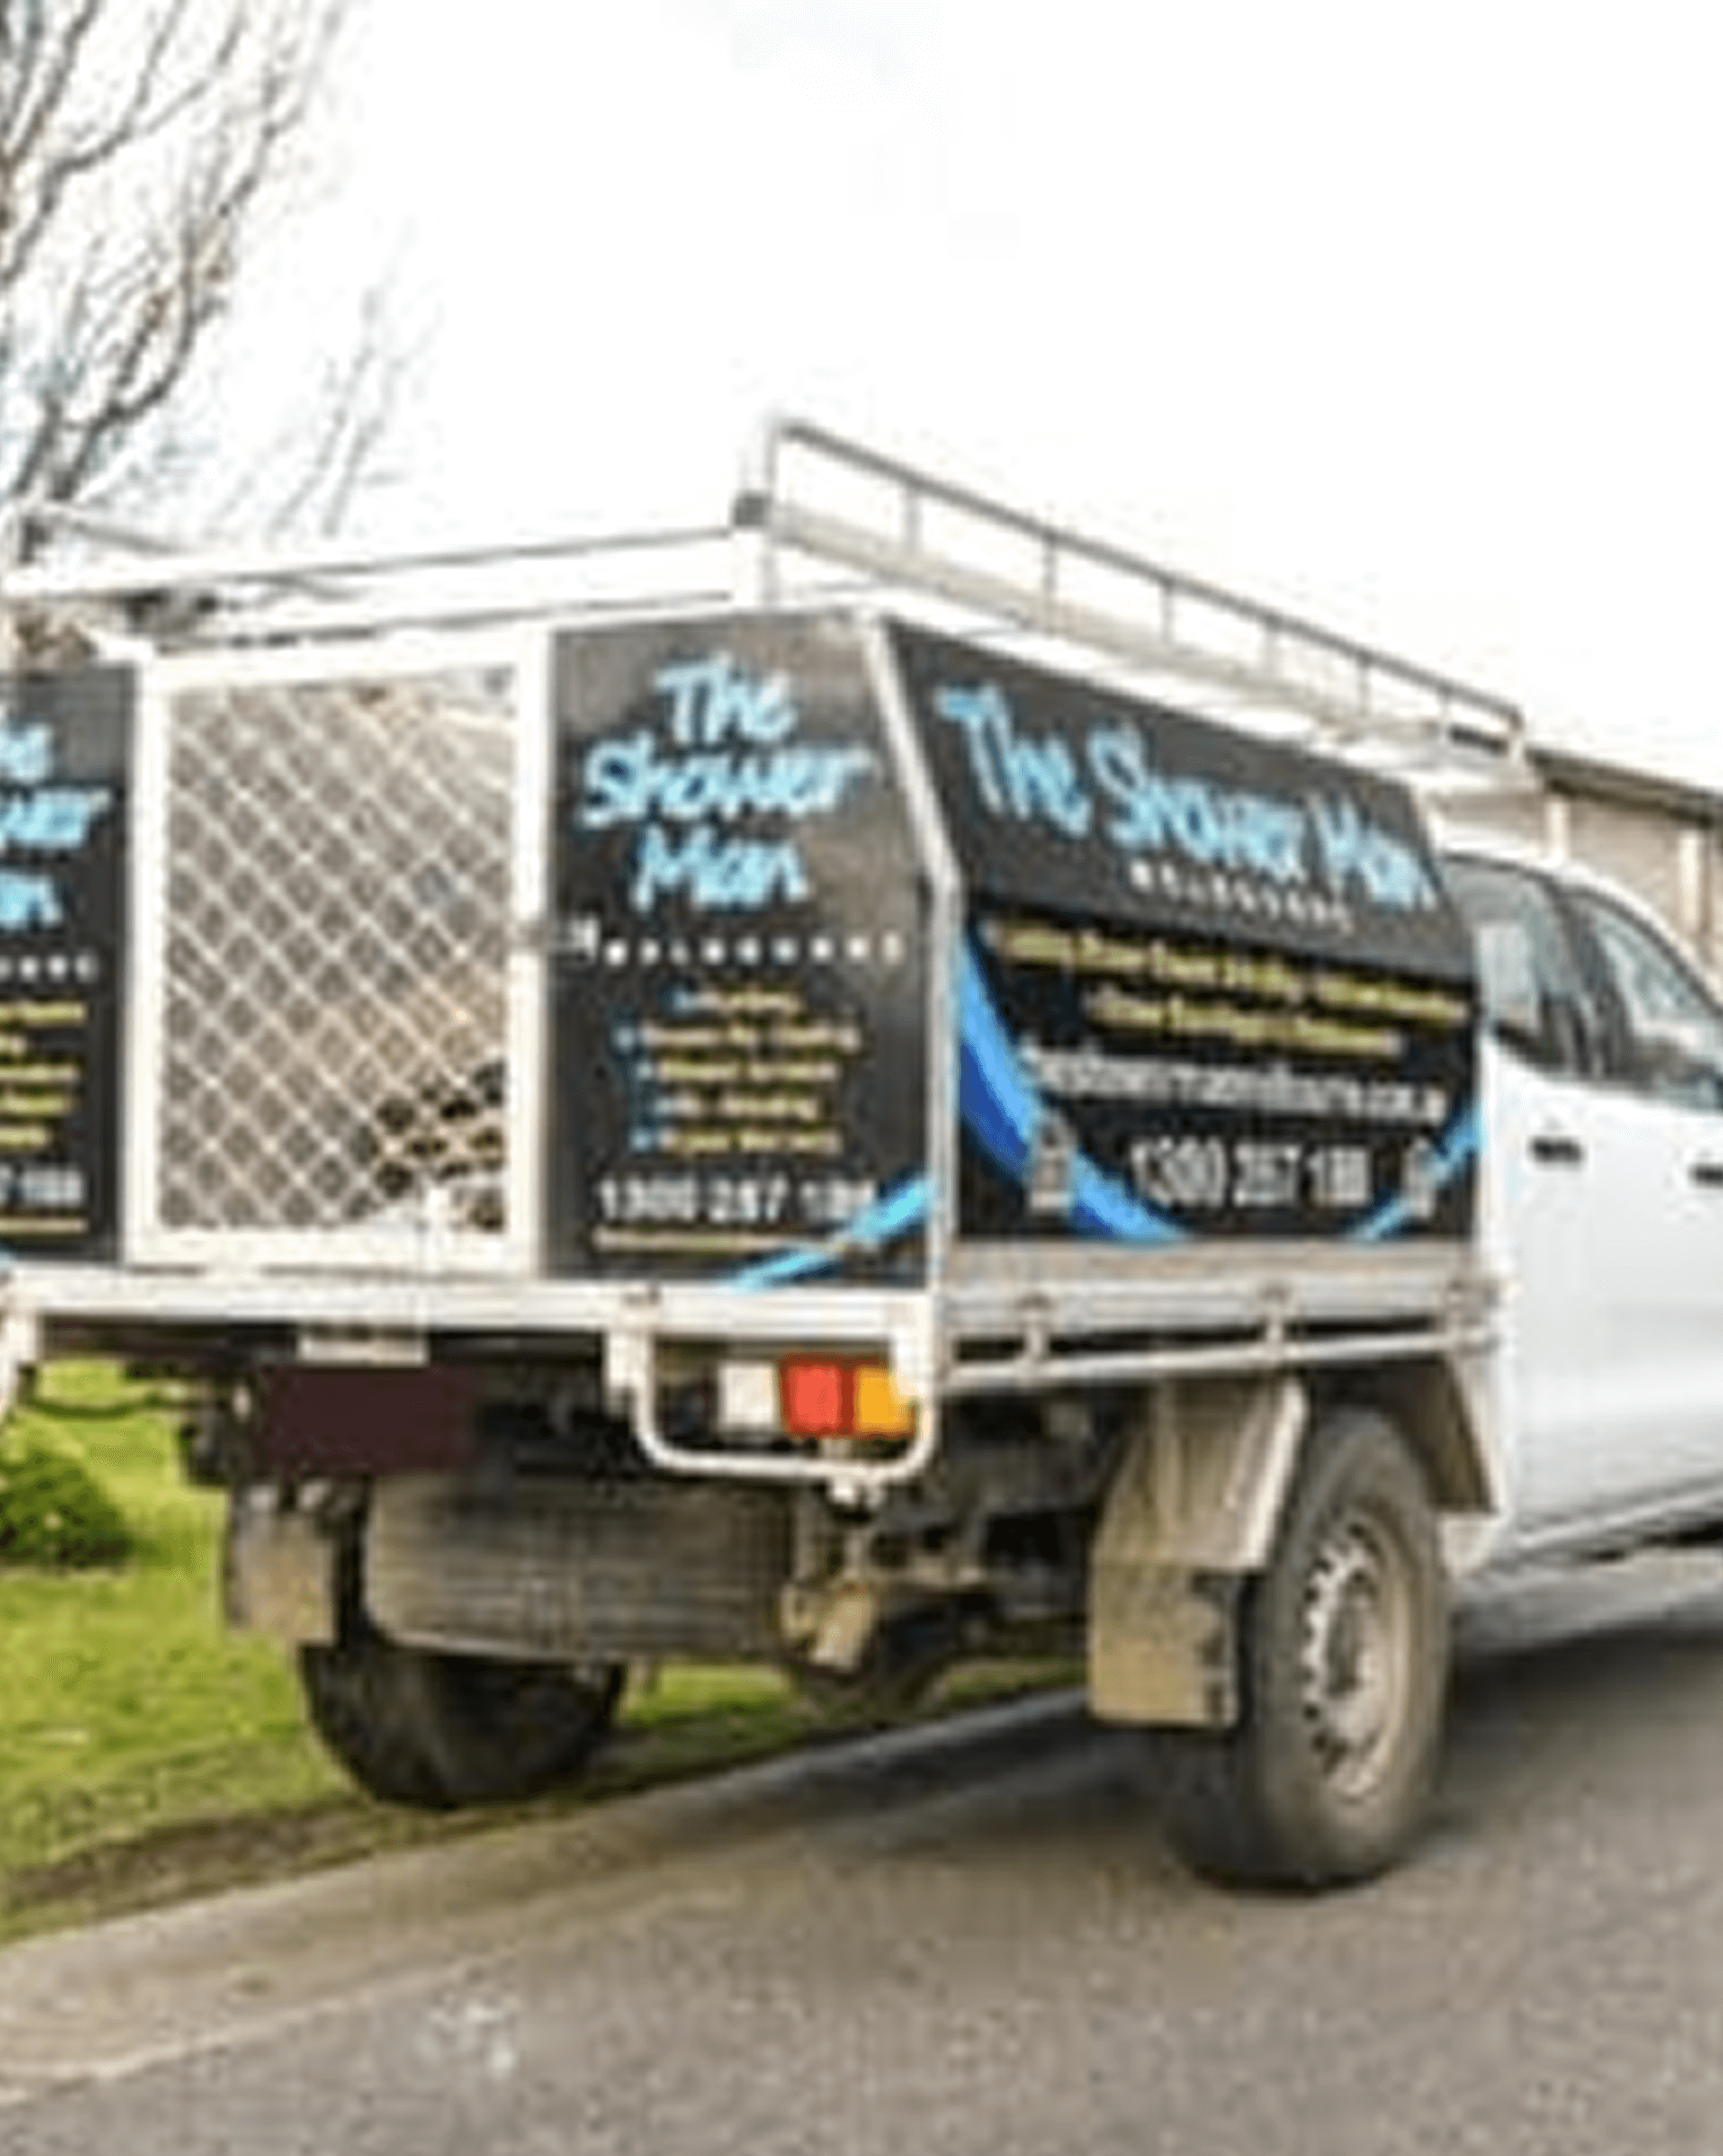
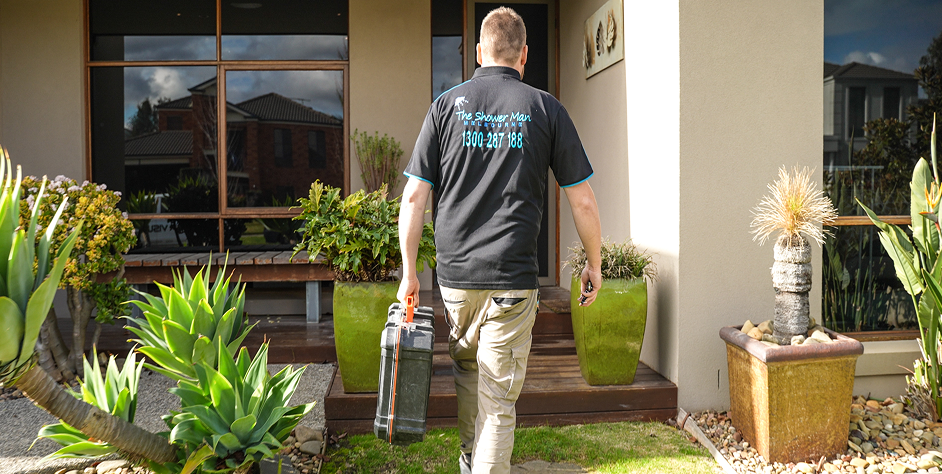
Not sure if your shower is compliant? Book a Professional Diagnostic Inspection with The Shower Man to check your waterproofing, water stops, and drainage.

IS THERE A SCREED BED UNDER YOUR SHOWER BASE TILING TO SUPPORT TILES AND CREATE FALL?

To ensure water drains correctly, a screed bed must be installed beneath the tiles to create the necessary slope. By law (AS 3740 and NCC standards), the minimum fall is 1:100 — meaning the floor must slope at least 1 mm for every 100 mm towards the waste outlet.

A quick way to tell if a screed has been installed is by looking at the height of the water stop or hob.

  • If the hob is less than 50 mm high, it’s often a sign that there isn’t enough depth to contain a proper screed bed.
  • Without a correct screed and fall, water can pool on the surface or seep under tiles, causing leaks and damage.

IS THE SHOWER SCREEN INSTALLED CORRECTLY?

For a shower to drain properly and avoid leaks, the shower screen must sit flush with the inside edge of the water stop or hob. If the screen is installed too far back (on top of the hob), water can pool at the base of the screen, overflow underneath, and get trapped inside the shower screen frame — leading to mould, water damage, and premature failure.

It’s also critical that silicone caulking is applied only on the outside of the shower screen frame, never on the inside. This allows any water running down the glass and collecting inside the frame to drain back into the shower, instead of becoming trapped.

ARE THE SPLITS WIDE ENOUGH TO SUPPORT THE GROUT IN PLACE?

On a compliant shower base, the diagonal splits (tile gaps) connecting each corner to the waste outlet should be at least 1.5 mm wide, or the same width as the other grout lines on the base. Anything narrower than 1.5 mm won’t hold enough grout to properly fill the joint and bond to the depth required.

When tile gaps are too tight, the grout becomes weak, falls out over time, and allows water to seep underneath the tiles, leading to leaks and water damage.

HAVE YOUR SHOWER BASE TILES BEEN LAID PRIOR TO THE WALL TILES?

To meet National Construction Code (NCC) requirements and ensure a watertight shower, the base tiles must always be installed before the wall tiles.

Unfortunately, many tilers install wall tiles first, then lay the base tiles during the same visit to save time — as wet base tiles can’t be walked on to tile the walls. This shortcut creates a major waterproofing risk:

  • If wall tiles are laid first, water can run down the walls and seep into the junction between the wall and base tiles.
  • When the base is tiled first, followed by the wall tiles, water is directed straight into the waste outlet — not trapped at the base junction.

This order of installation is critical to achieving NCC-compliant waterproofing, preventing hidden leaks and long-term damage.

what to expect during your showroom visit

video
play